In our previous tutorials we created a new scene and imported a puppet. If you missed that you can follow that tutorial [here].
In this tutorial we will take a look at the ‘Record’ screen.
The first time you open the ‘Recording’ screen it can be intimidating. Lots of dark grey windows (or panels) with nothing to see. These windows are labelled below;
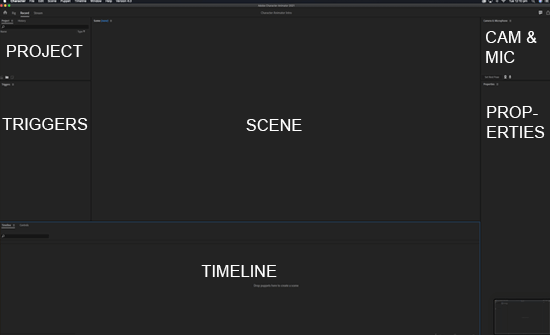
If we look at the top left we can see the ‘Project’ window. The ‘Project’ window contains all of the assets that we have brought into this project. An asset can be a puppet. An image (such as a background) or a sound file.
You’ll notice that there is also a tab for ‘History’. Character Animator is always saving itself – so if you wanted to revert back to a previous point in your work, you can do that using the history window.
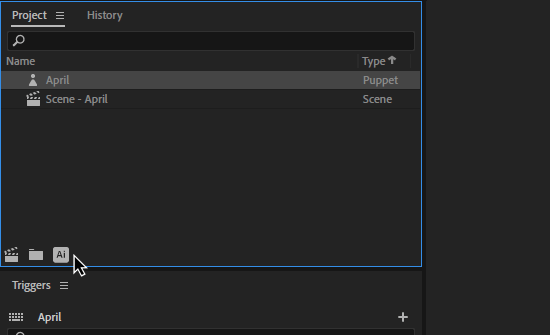
Click back on the ‘Project’ tab.
Inside the Project tab you should see two assets. Your puppet (in our example ‘April’) and the scene we created in the previous tutorial (‘Scene – April’).
If you select the puppet, you might notice some of the screens change. Try clicking on the scene asset. You are getting different options than the puppet.
While the scene is selected look over on the right of screen where there is a window called ‘Properties’. This is showing you the properties or setting for this scene. You should see some options. Frame Rate, Duration, Width and Height.
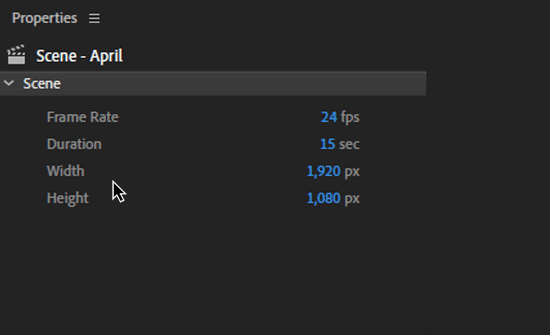
Frame Rate is where you set the amount of frames your scene will play per second. This is often 24 or 25 fps (frames persecond). Sometimes if you want a more stop-motion style you might change this to something like 12 fps.
Duration is the length of the scene. So if you know you only need 5 seconds for your scene you can set that here and it will be reflected in the timeline.
Width and Height are the dimensions of your scene. This is often 1,920 wide and 1,080 high – but you can set it to whatever your project requires.

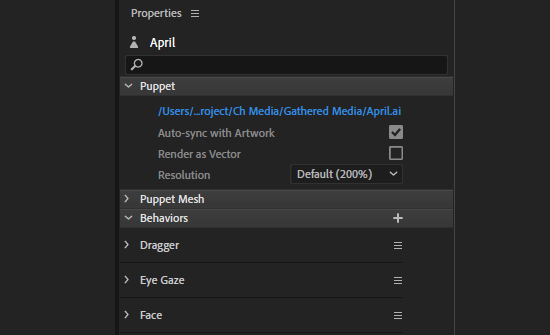
Lets go back over to the right of screen and click on the puppet in the properties window. You’ll notice the ‘Properties’ and some other windows change.
Lets take a look at these.
At the bottom of the ‘Project’ window there are three icons. If we hover the mouse over these we can see they are ‘Add New Scene’. ‘New Folder’ and ‘Edit Original’.
We have already used the ‘New Scene’ button. It launches a new scene with the selected puppet. ‘New Folder’ creates a folder inside the Project window that helps keep larger projects organised.
The other button is ‘Edit Original’. Depending on how your puppet was created, this will either be a Photoshop (Ps) or Illustrator (Ai) icon. If you click this, it will launch that program and you can edit the puppet. When you save the puppet in Photoshop or Illustrator it will automatically update inside Character animator. We will take a more detailed look at editing puppets at a later stage.
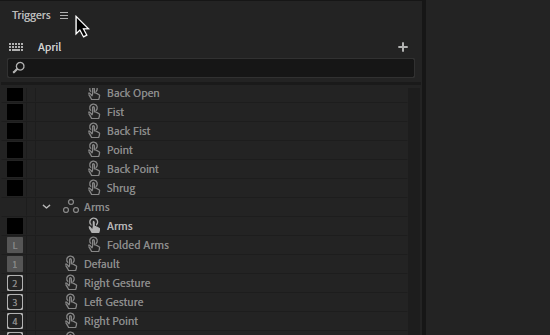
Below the ‘Project’ window is a window called ‘Triggers’. Triggers are keys that have been set for the puppet to trigger an action. For example, if your puppet had a hat, you might hit ‘H’ and t turns a hat on or off. You won’t really need to use the triggers window when you are animating.
If we continue down we can see the ‘Timeline’ window. The timeline is where our performances or ‘takes’ are recorded. If we did a pass where we hit record and just created blinks, then a blink ‘take’ would be created in the timeline. The timeline is where you spend most of your time refining and editing your animated performances.
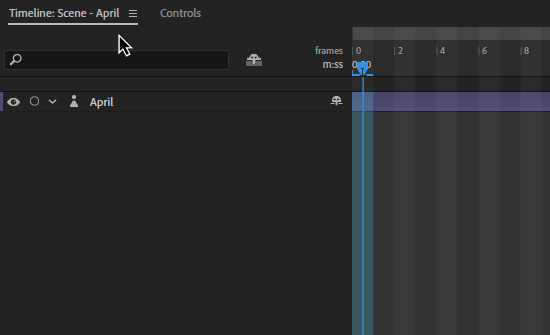
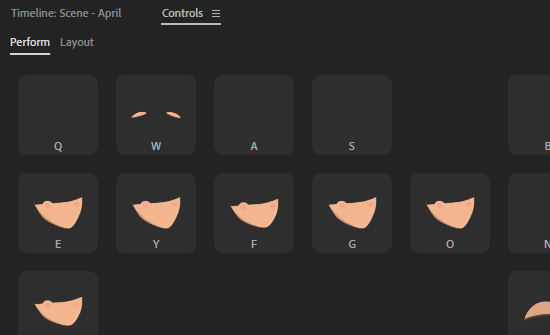
If you look at the top of the timeline you will see a tab called ‘Controls’. If you click on that, it should show you a bunch of triggers for your puppet. If you click and hold any of these they should make the puppet perform an action.
[ElectroPuppet create a .pdf trigger-sheet for all our puppets, so you can print and have a similar resource always handy]
Above the timeline/controls window we have the ‘Scene Window’. This is where we can see the animated scene we are creating. Think of it like a stage. Below this are a few controls and settings.
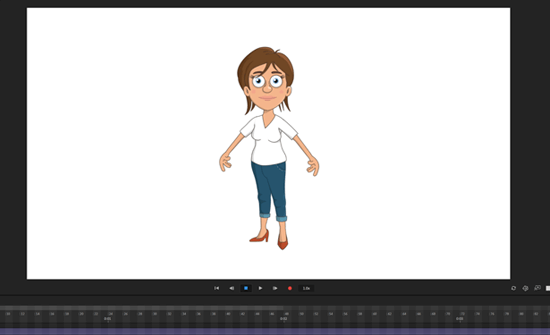
On the left we can see the frame count and fps setting (frames per second).
In the middle are some playback controls. If you hover the mouse over these you will see an explanation of what each does.
The first jumps the playhead back to the start of the timeline. The next control will step back a frame. Then the stop button. Play button. Step forward a frame and the record button.
The next little box, which probably reads 1.0x is the playback and the recording speed setting. Sometimes when recording you want the speed to play a little slower so you have a bit more time to control the puppet. You can set these here.
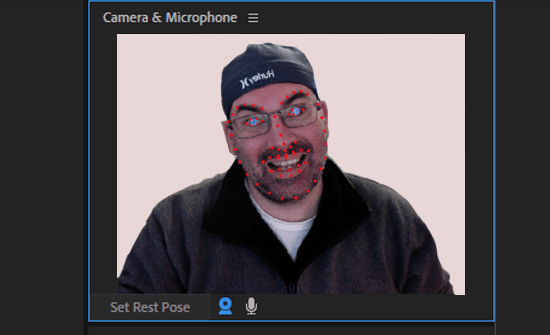
On the top right of screen is the Camera & Microphone window. This is where you can turn your webcam and microphone on and off. It is best to have these off unless you are in the process of capturing something.
There is also a button ‘Set Rest Pose’. This is a really important button that you should be hitting before every take using the camera input. ‘Set Rest Pose’ will reset the relationship between you and your puppet. Often the camera will think some strange pose is the neutral position, and your puppet will get stretched and twisted to try and match your position. So it is really important to sit comfortably in front of your camera and hit ‘Set Rest Pose’ before every take.
Finally, we have the ‘Properties’ window. This is where the scene settings for the puppet reside. This can get a little confusing, but when you change a setting (like the scale) it will change that for the puppet in the scene – however it won’t change that setting in the puppet itself. That is a good thing, because you may require several scenes with the same puppet with various scale settings.
The property window contains settings for Dragger, Eye Gaze, Face, Lip Sync, Physics, Transform and Triggers. It also holds any behaviours or additional controls you or your puppet maker has added. Too much to go into detail in this introductory tutorial. We’ll cover that in more detail in our animation process tutorial.
In this tutorial we took a look at the ‘Record Screen’.
We looked at the ‘Project’,’Triggers’,’Timeline’, ‘Stage’, ‘Camera & Microphone and ‘Properties’ windows.
ElectroPuppet acknowledges the traditional custodians of the land, the Gumbaynggirr people.
We pay our respects to their elders, past, present and emerging.