This is Part 3 of our Audio tutorial.
In the previous tutorials we looked at the equipment you may want to use to capture a good recording [Part 1] and the process of capturing and cleaning-up an audio recording [Part 2].
In this tutorial we are going to look at the tools to edit your audio and then how to export multiple tracks and a final mixed track.
First thing we want to do is create a multitrack session. A multitrack session will allow us to lay out our audio across various tracks. You might have two or more characters that are speaking in a scene. So we want to have each audio file isolated in its own track. To make a new multitrack session click on;
File> New>Multitrack session

There is also a ‘Insert into Multitrack’ button on the top left of screen.
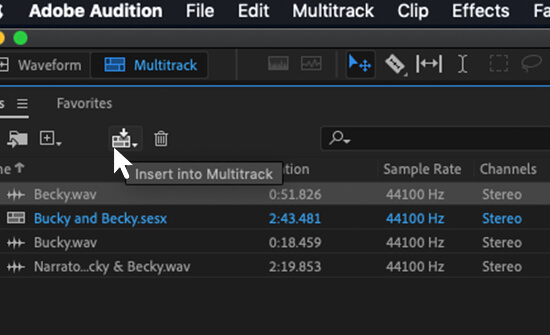
Be careful where you save the Multitrack file. You may need to find it later. (We have a tutorial on setting up file and naming structures for Adobe Character Animator. Make sure you take a look at that [here].)
Next we are going to name our tracks. In my example I have a Narrator and Bucky and Becky characters. So I am going to click on ‘Track 1’ and rename it ‘Narrator’. I’m then going to do the same for my other character voices. This just keeps everything more organized and if someone else needs to open the project they can easily identify which track is which character.
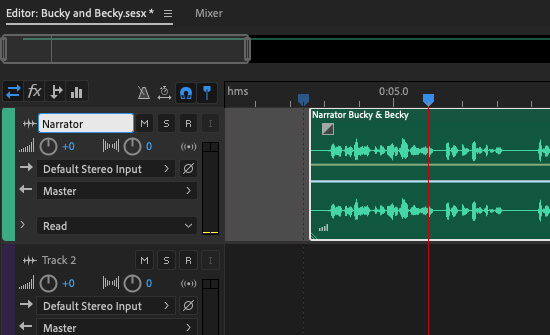
Then we want to drag the appropriate audio file into each track.
You can also bring in your music and sound effects if you like. I’m going to just focus on the dialogue for now.
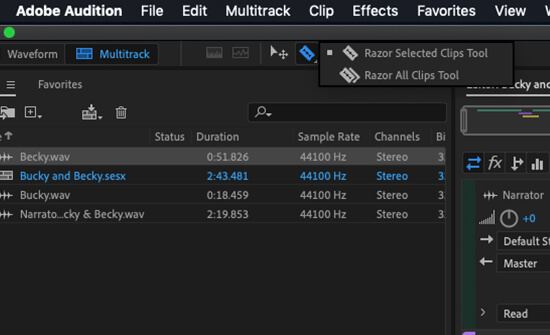
The main tools we will be using are the selection tool and the razor tool. Make sure the razor tool is set to ‘razor selected clips’ (and NOT razor all clips).
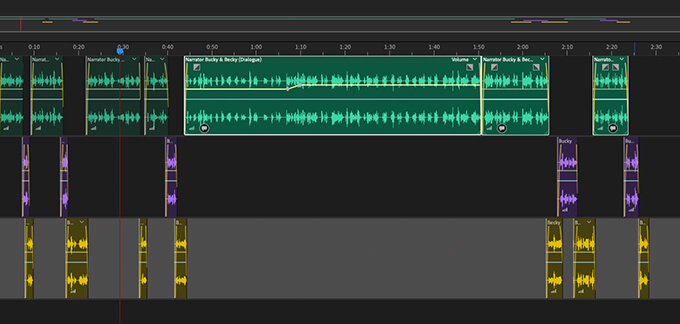
Now what we are going to do is start cutting each clip into little blocks of dialogue and shuffling them along the timeline to create the best timings for a natural sounding conversation. Sometimes you might want a pause for a character to react. Other times you might want a character to start talking over the top of the other character.
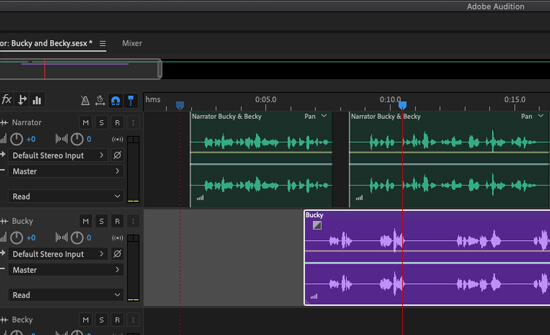
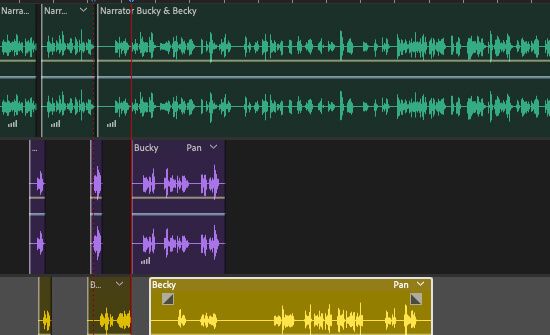
You may also need to adjust the volume of one (or several) of the recordings. Sometimes an actor gives a louder performance or the recording was slightly different. You want to adjust those kind of things so it all sounds like it is happening in the same space.
You can boost the overall channel volume – or if you find you want to boost (or reduce) a certain area, you can click to create a little node on the yellow audio line control and play with those settings.
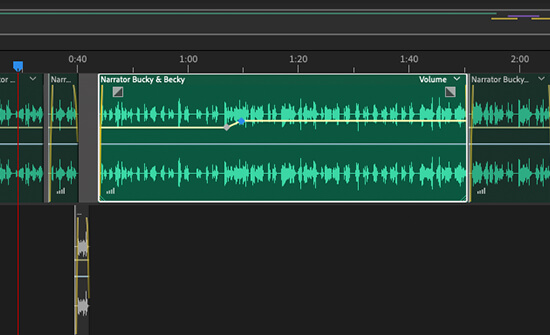
Each clip also has a fader control you can use to fade in and out. This is helpful if you have a noticeable background noise. I often set these – just to be safe.
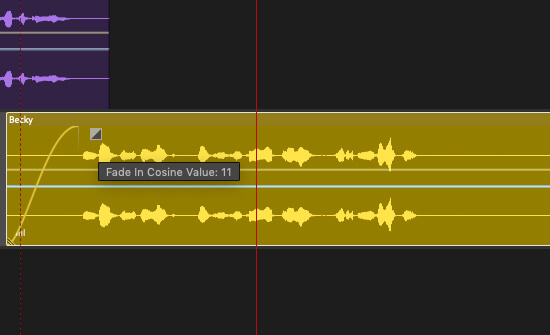
Effects can be added – however Adobe Character Animator works better with raw audio. We will talk about some effects you can add after we export each individual track.
Why do we need to export individual tracks?
The reason we want to do this is if we just took a single mixed track into Adobe Character Animator, the software wouldn’t be able to distinguish between each characters dialogue (and other sounds). So we only want the dialogue for each character – exported as its own sound file.
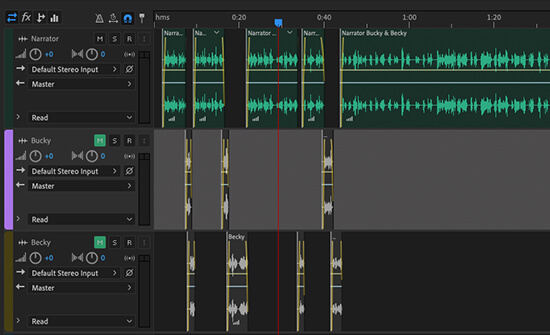
To do this we hit the mute button, a little ‘M’ icon on each track. Notice on the image below how the muted track becomes greyed out. We want to mute every track – except the one we are exporting.
Then we go;
File>Export>Multitrack Mixdown> Entire Session
And save the file name something appropriate.
Then we will mute that track, and unmute the next one, and export that track on it’s own. After exporting each individual track, we can turn them all back on and add any effects we may want in our final mix.
You may want to add effects like pitch-shift or echo. You may also be thinking about using Essential Sound. Essential Sound is a feature in Adobe Audition that can help distinguish dialogue, music and sound effects.
Essential Sound is a feature that allows you to nominate a predefined effect (such as background voice). If you can’t see it, you can find it in;
Window>Essential Sound
If you marquee select everything in a track, you can then choose an appropriate preset.
Just keep in mind any changes you make in the final mix that change the speed or placement of the audio will make the master track not sync up with the individual tracks we created.
The final Mix is when you want to blend everything together. Dialogue, Sound Effects, Music and Ambient Sound.
All you need to do is make sure you have that mute button off for everything and then;
File>Export>Multitrack Mixdown> Entire Session
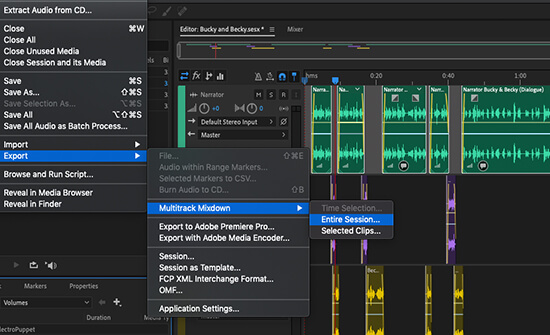
This gives you a master mixed version of your audio you can use in Adobe Premiere Pro, After Effects or however you are compiling your final work.
In this tutorial we took our sound recording and learnt how to export individual and a final mixed track for use in Adobe Character Animator, After Effects and Premiere Pro.
In the next tutorial we will look at importing our audio tracks into Adobe Character Animator and applying the lip-sync feature to get our characters speaking!
Stay Tuned!
ElectroPuppet acknowledges the traditional custodians of the land, the Gumbaynggirr people.
We pay our respects to their elders, past, present and emerging.