The next step is to ensure you have the right equipment to capture a quality voice performance. We covered that in a tutorial [here]
So you have the perfect script! Whoohoo!
You have all the equipment! Hooray!
The next step is capturing your audio. Yay!
There is a range of software, both free and paid, that will allow you to capture and edit your audio. Two popular programs are Audacity and Garage Band.
In this tutorial, we will use Adobe Audition – which is part of the Creative Cloud. Users of Adobe Character Animator should have access to that for free. If you are using something else, you should be able to follow along and apply the same techniques.
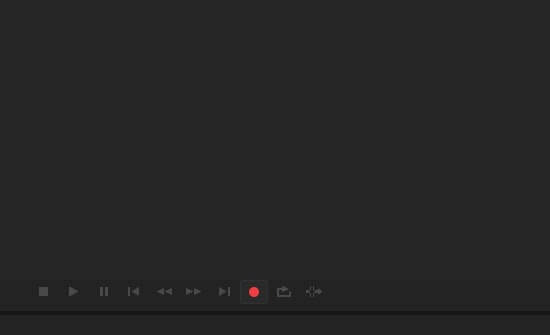
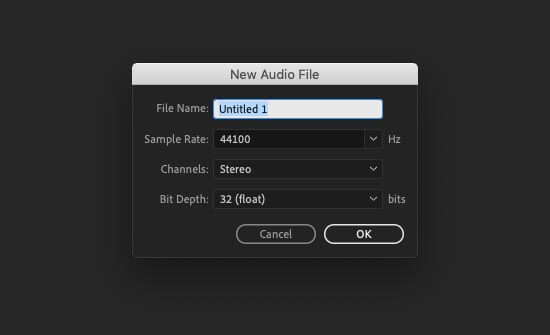
After opening Audition, click on the red ‘Record’ button and select ‘New Audio File’.
First thing Audition will ask is where you want to save the audio file. Be careful where you save the file. You’ll need to find it later.
We have a tutorial on setting up file and naming structures for Adobe Character Animator. Make sure you take a look at that [here]
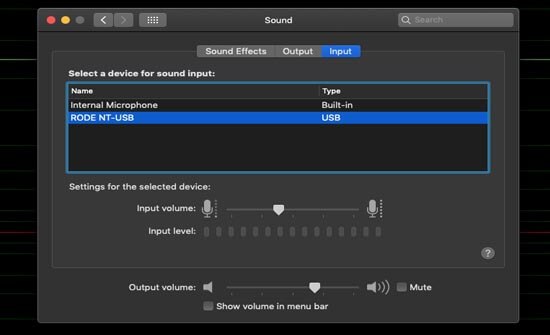
First thing we are going to do is to ensure that the levels aren’t going into the red. Start speaking into the microphone at the volume you intend to record your voice at.
Keep an eye on the levels. You don’t want to see red – particularly if it leaves a little red line at the far right. This means your levels have peaked and gone beyond the limits of the microphone.
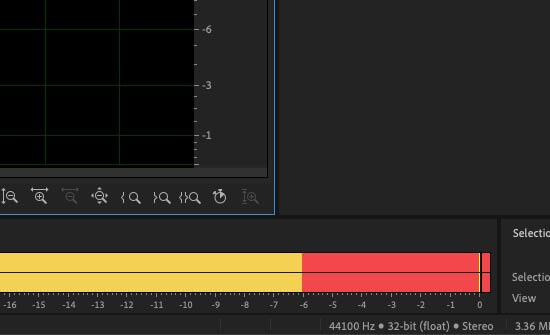
You need to adjust your input settings, and dial down the input levels of the microphone. Save you settings and then test the levels again.
Getting yellow is fine.
Before and after recording, make sure you leave some silence (or dead air). This is good practice, because sometimes if you hit record and immediately start speaking, you may find the recording cuts in late.
Leaving a gap also gives more options when editing. Most importantly, it will provide you with a sample of the ambient room sound. Something we will use in a moment.
Make sure you aren’t moving around in your chair, breathing heavily or clicking the mouse. We just want that neutral room tone.
When recording, just keep going. If you give a poor reading or make a mistake, take a moment and continue. Don’t stop recording. We will concentrate on removing mistakes when we edit the audio. If you are reading from a screen make sure you are all setup before recording. If you are reading from printed paper, have it positioned in a comfortable position before you start. We don’t want the sound of shuffling paper!
If you are recording multiple characters, it is best to just record one character at a time. This makes it easier to stay in character – and keep your vocal quirks in character. Read the other characters line in your head – so that your reading sounds like a genuine response.
Again – don’t worry about how this all fits together. We are going to concentrate on editing and laying out audio tracks in the next tutorial.
First thing we want to do is find one of those silent areas and marquee select it
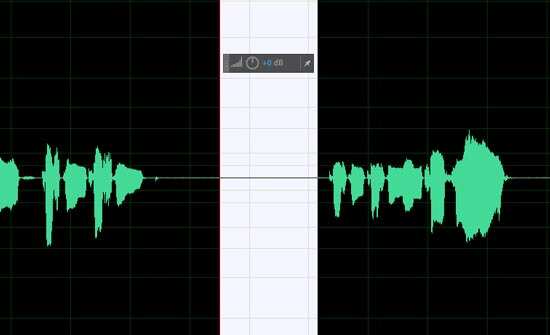
This is going to give us a sample of the ambient background sound. We then want to select the entire clip by either hitting Cmd/Ctl + ‘A’. We are then going to go to;
Effects> Noise Reduction/Restoration> Capture Noise Print.
What this does is analyze your ambient background sound and capture it.
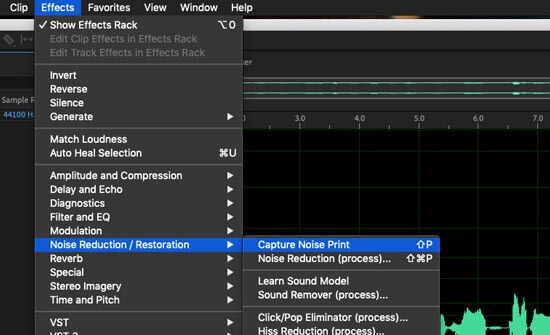
Next we are going to go to;
Effects> Noise Reduction/Restoration> Noise Reduction Process.
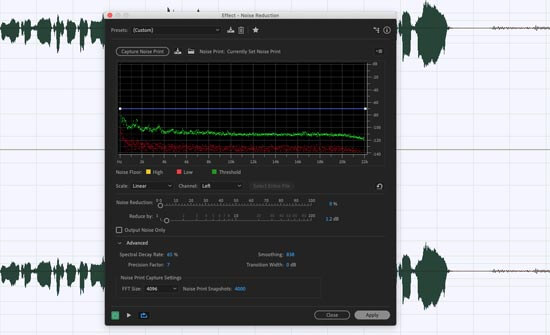
We tend to use the default settings for this. What this does is remove the background ambient sound. This makes your voice recording crisper and clearer.
Another thing you may do is to boost the overall audio if you are a little soft.
To do this, select all and then select;
Favorites> HardLimitto-1db
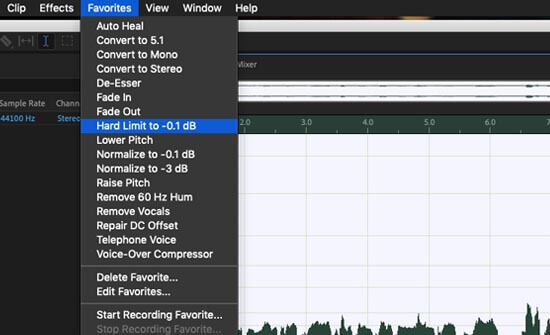
What this is going to do is raise the levels to a consistent volume.
One thing to keep in mind if you add this step. You will need to repeat this with all audio you capture. Otherwise other dialogue will sound different.
Now we have audio that has been cleaned up, we can go over it and remove any mistakes. Headphones are essential here – so you can hear any weird sounds you may not pick up through your computer speakers. Marquee select any bad take. Make sure you leave some silence around it – then delete it.
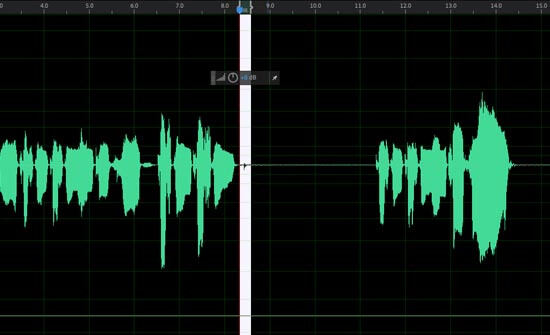
Don’t worry too much about the timing of the audio. We’ll adjust that in the next tutorial. What we want is to have all the best takes with silence in between in one audio file.
The final step is to save your audio file as something new. Just in case we need to go back to the original raw sound file. Again – be sure to have a good naming structure for your production – so everything is easy to locate later.
Our aim here was to capture a quality recording. Clean it up. Remove any unwanted takes. And then save the file.
In our next tutorial, we’ll look at editing and laying out the audio for single voice and multi-voice productions.
You can go to that [here].
ElectroPuppet acknowledges the traditional custodians of the land, the Gumbaynggirr people.
We pay our respects to their elders, past, present and emerging.